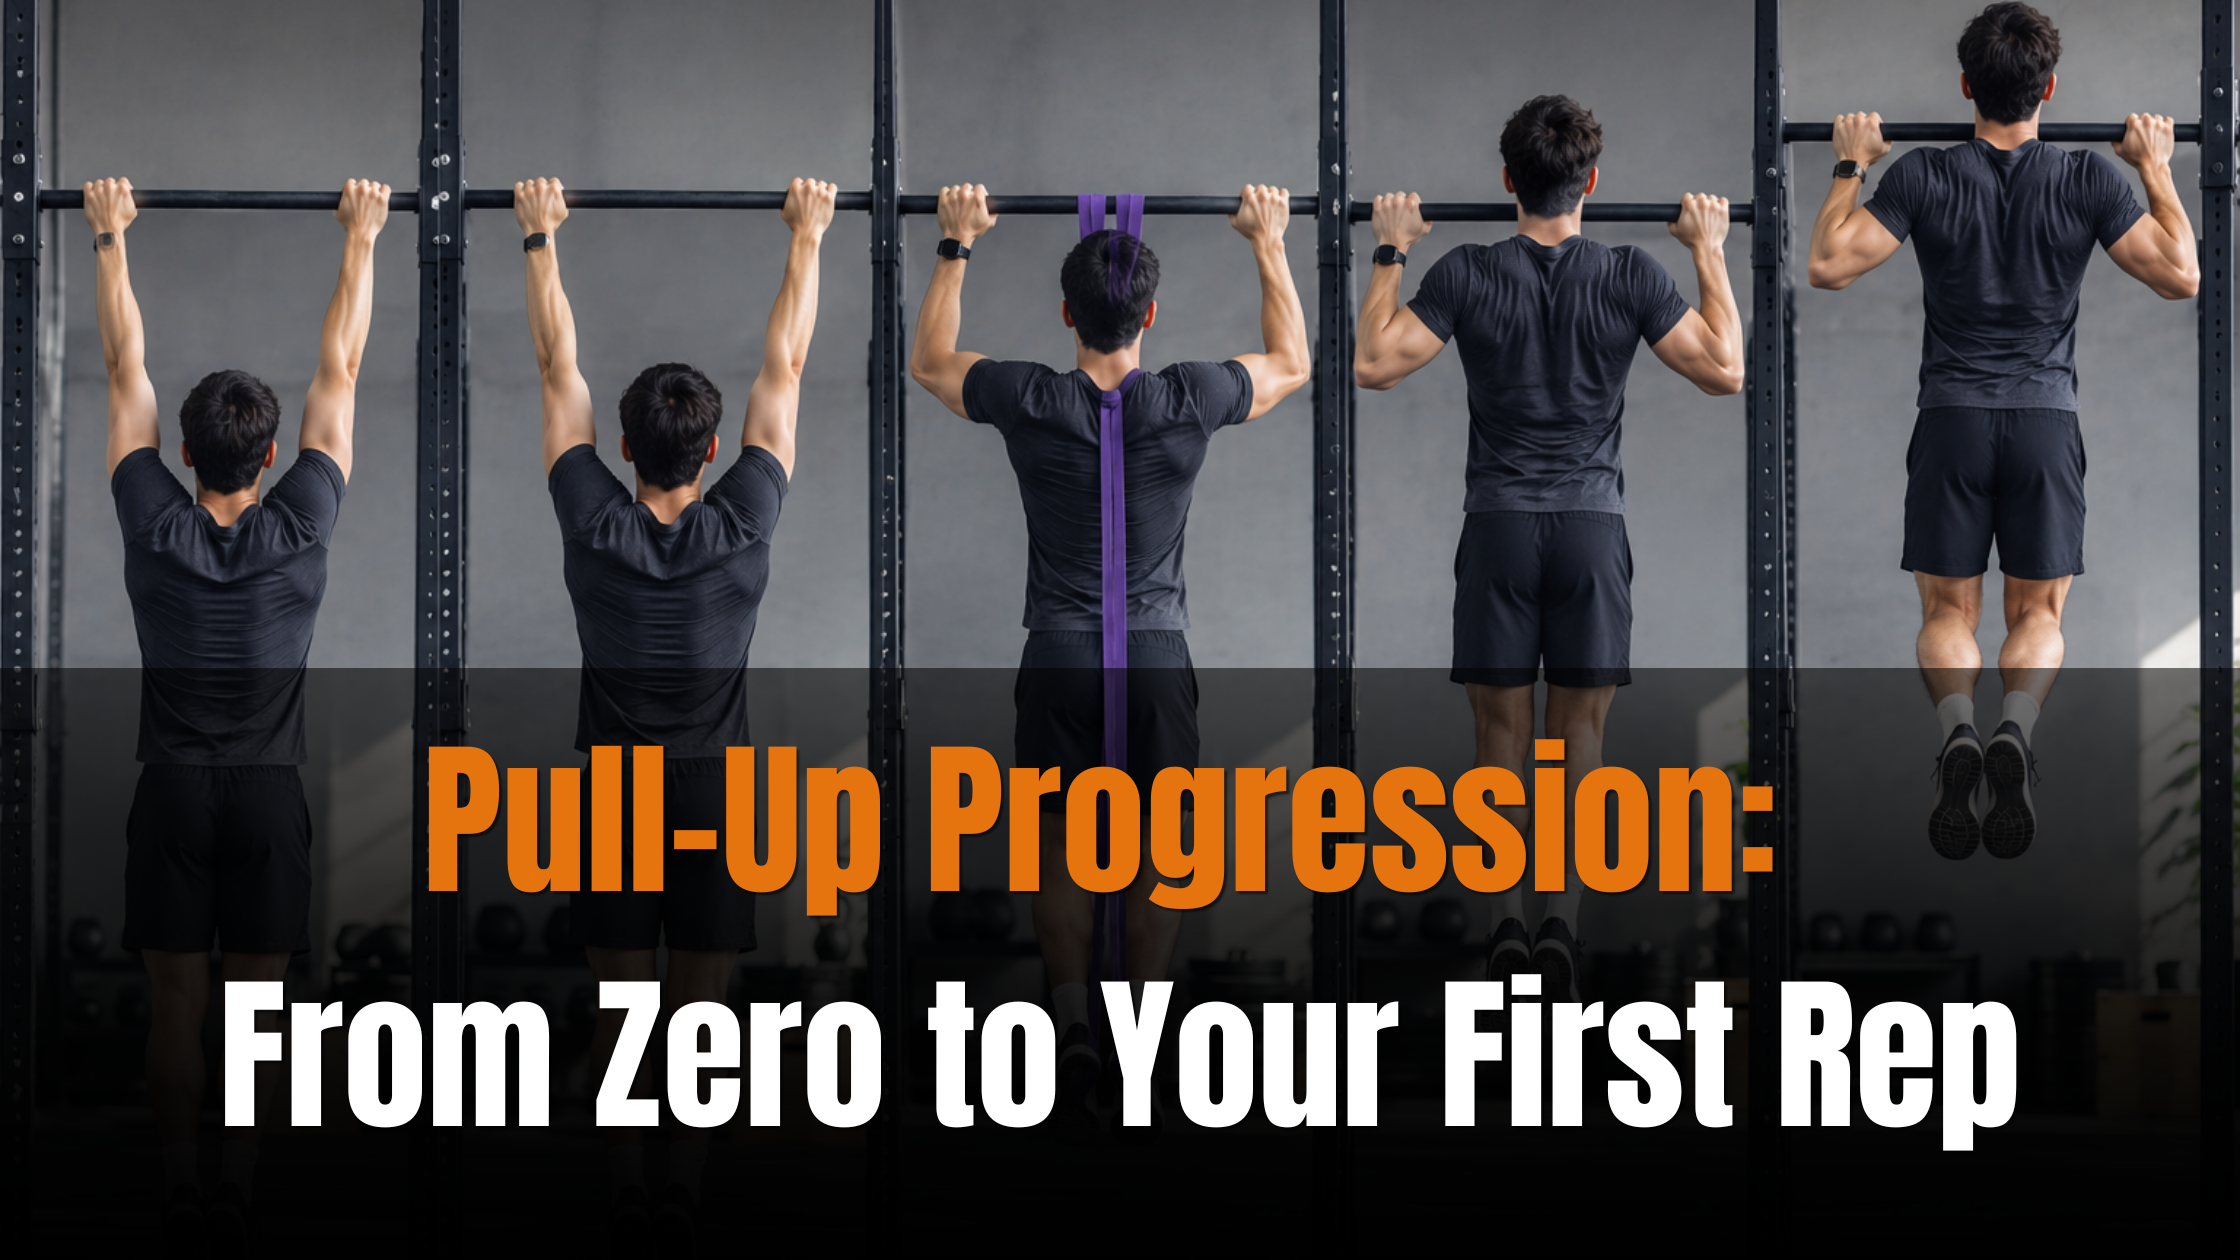
How do I progress toward my first pull-up?
Work through four stages in order: passive hang, active hang, negative pull-up and assisted pull-up. Each stage builds the strength and body position you need for the next one. Move to the next stage only when you pass the hold-time or rep test for your current stage.
This is the pull skill that sits at the heart of the calisthenics for beginners journey. Everything in calisthenics that involves pulling — rows, muscle-ups, front levers — starts here.
Why most pull-up guides miss the first two stages
Most guides jump straight to band-assisted pull-ups or negatives. Both require shoulder stability and grip endurance you have not yet built if you have never trained a pulling movement. Skipping the hang stages means your joints are not ready, and progress stalls or an injury follows.
The four stages below fix this by treating the dead hang as a proper training target, not just a warm-up.
Stage 1
Passive hang
What it is: You hang from a bar with straight arms, letting gravity do all the work. Your shoulders are relaxed and elevated — they ride up toward your ears.
Why it matters: Builds grip endurance and begins to lengthen the lats, biceps and forearm flexors. Conditions the shoulder joint before any load goes through it.
How to train it:
Hang from a pull-up bar or a sturdy beam. Let your shoulders relax fully. Start with whatever you can hold.
| Week | Target hold | Sets |
|---|---|---|
| 1 | 10 seconds | 3 |
| 2 | 15 seconds | 3 |
| 3 | 20 seconds | 3 |
| 4 | 30 seconds | 3 |
Test to move on: Three sets of 30-second passive hangs with 60 seconds rest between sets.
Stage 2
Active hang
What it is: You hang from a bar but actively pull your shoulders down and back, away from your ears. Arms stay straight. This is the starting position for every pull-up you will ever do.
Why it matters: The active hang teaches scapular depression and retraction — the shoulder movement that initiates a real pull-up. Without it, beginners use only their arms and stall at chin level.
How to train it:
Take a passive hang, then squeeze your shoulder blades down and together without bending your elbows. Hold. Release back to passive. Repeat.
| Week | Active hold | Sets |
|---|---|---|
| 1 | 5 seconds | 4 |
| 2 | 8 seconds | 4 |
| 3 | 10 seconds | 4 |
| 4 | 15 seconds | 4 |
Test to move on: Four sets of 15-second active hangs with 60 seconds rest.
Stage 3
Negative pull-up
What it is: You start at the top position — chin over the bar — and lower yourself as slowly as possible until your arms are straight.
Why it matters: The lowering phase (eccentric) of a pull-up builds more raw strength than the pulling phase. Most beginners find they can complete a negative before they can complete a full rep. Negatives close this gap quickly.
How to get to the top position: Use a chair, a box or a jump to get your chin over the bar. Do not kip or swing.
| Week | Target lowering time | Sets x reps |
|---|---|---|
| 1 | 3 seconds | 3 x 3 |
| 2 | 5 seconds | 3 x 3 |
| 3 | 5 seconds | 4 x 3 |
| 4 | 8 seconds | 4 x 3 |
Rest 2 minutes between sets.
Test to move on: Four sets of 3 negatives with an 8-second lowering phase.
Stage 4
Assisted pull-up
What it is: A full pull-up — chin over bar, from full hang — with some assistance. You can use a resistance band looped over the bar with one knee inside it, or a training partner holding your ankles.
Why it matters: Bridges the gap between the strength you have built in stages 1 to 3 and the strength a full rep requires. Over several weeks you reduce the assistance until you no longer need it.
| Week | Assistance level | Sets x reps |
|---|---|---|
| 1 | Heavy band | 3 x 3 |
| 2 | Heavy band | 3 x 5 |
| 3 | Medium band | 3 x 3 |
| 4 | Medium band | 3 x 5 |
| 5 | Light band | 3 x 3 |
| 6 | Attempt unassisted |
Test to move on: Three unassisted pull-ups from full hang with no kipping or swinging.
Grip: overhand or underhand?
Use an overhand (pronated) grip throughout this progression. Chin-ups — underhand grip — are slightly easier because the biceps contribute more. Building strength overhand first means chin-ups become easier as a bonus. The pull-up progression post on this site covers both grips in more detail.
For grip training between sessions, add 20 seconds of passive hang to the end of your other workouts. Grip strength is also one of the four beginner calisthenics moves covered separately — the inverted row in particular builds the same back muscles used in stage 2 and 3 of this progression.
Common mistakes
Shrugging during the hang: Let shoulders relax fully in stage 1. Do not hold tension there. Bending the elbows in the active hang: Arms stay straight. Only the shoulder blades move. Rushing through the negative: Count out loud. Five seconds feels long. Eight seconds is harder than it sounds. Using too strong a band: You want to feel the work. If a heavy band makes the movement feel effortless, switch to a medium band. Kipping to get the chin over the bar: Kipping is a separate skill for later. Here it bypasses the stages and stops the progression working.
How this fits your overall calisthenics programme
Once you have your first unassisted pull-up, add it to your home sessions alongside push and leg work. The calisthenics workouts at home post shows how to structure a full session that includes pulling. Aim for two pull sessions per week with at least 48 hours between them.
If you want a coach to track your grip time and adjust the stage timing around your specific progress, the CoreFlow coaching programme builds pull-up work into every training block.
FAQ
How long does it take to get your first pull-up from zero?
Most beginners working through stages 1 to 4 consistently achieve their first unassisted pull-up in 8 to 12 weeks. Grip strength and body composition both affect the timeline. Heavier bodyweight means more load to move, which means the band-assisted phase takes longer.
Can I do pull-up progression every day?
The muscles used — lats, rhomboids, biceps, forearms — need 48 hours to recover between sessions. Three sessions a week is the right frequency. Daily work on the passive hang only is fine because it is a stretch, not a strength effort.
Should I do negative pull-ups before I can do a full one?
Yes. Negatives are the most direct way to build the strength a full rep requires. They load the same muscles in the same range of motion. Most people can control a 5-second negative weeks before they can pull up from a dead hang.
What if I do not have a pull-up bar?
A pull-up bar fits most standard door frames and costs around £15 to £25 in the UK. Alternatives include a sturdy tree branch, a beam, or the underside of a sturdy table (for inverted rows as a stepping stone). Rings hung from a beam are a good long-term option.
Is grip strength a limiting factor for pull-ups?
Yes, especially in stage 1. The forearm flexors fatigue quickly in beginners. The passive and active hang stages fix this directly. Add 20-second hangs to the end of other sessions to speed up grip development.
What comes after the first pull-up?
Add reps over the next four weeks — 1, 2, 3 reps per set — then add sets. Once you reach three sets of five clean pull-ups, you are ready to explore weighted pull-ups or ring rows.